Note: the instructions in this FAQ apply only to the old User Interface.
Not sure which interface you're using? Click here to work it out!
Here is how the integration works in a snapshot:

FOR DIRECT CUSTOMERS INTEGRATING FOR THE FIRST TIME WITH Sage One
Squirrel Street's direct integration with Sage One works by you assigning Squirrel Street receipts with the appropriate Sage One account code, then exporting directly into your Sage One account.
Sage One integration consists of the following steps:
1) The first time you start the integration, make sure you already have at least one receipt entered in your account.
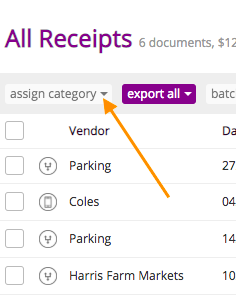
2) Login to Squirrel Street and goto to the Receipts page. To the top of your receipts list, click on Export all > Accounting Exports. Then click on the link to start linking Squirrel with your accounting software.

Or alternatively, login to your account and then click on this link
If you haven't integrated any accounts, you should see this:

3) Select your Squirrel Street account from the "Link" drop down menu and for the "To" menu, select Sage One.

Then click on "Add integration".
4) Follow the setup prompts carefully. You'll be required to enter your Sage One credentials.

5) Choose the correct Sage One account to export to from the drop down menu, then click "Save".

6) Then you will be asked to choose the appropriate posting settings. You can change these settings later if necessary. At the moment, you can only export to Supplier Invoice in Sage One.

Once the connection is successful, Squirrel Street will import your most current Chart of Accounts. (This is automatic and may take a while depending on the quantity. It will refresh upon each export attempt).
7) Go back to Receipts and, selecting the appropriate receipt(s), use the "Assign category" button to assign the appropriate account codes to each receipt. (Your Chart of Accounts will appear in the drop down menu).
If you have many documents to code, click here to get instructions for bulk coding.
8) To test the connection, try exporting some coded receipts by, clicking on "Export all/Export selected" and selecting "Accounting exports", then Export to Accounting

9) Once successfully exported, these receipts will then be assigned the category "exported", which means they will not export again.
10) Login to Sage One and locate the transactions.

THINGS TO REMEMBER:
- Only receipts with a 'Sage One -' category added will be picked up by the export and added to your Sage One account.You will see a confirmation message with all the exported receipts on the Accounting exports page once the process is complete.
- In the receipts page, you'll see the 'Exported' category added to receipts that have been successfully exported.
- If you have receipts that have a Sage One category added to them, but you don't want them to be picked up by the export process, add the 'Do not export' category to those receipts, and the export process will skip those.